Placing "Add New Post" in a Workflow
Piklist’s Workflow system is incredibly powerful. It allows you to divide a page into different tabs. In this tutorial, we’ll use the Workflows to divide the default WordPress add new Post page.
-
Review the “Building Your First Workflow” tutorial to get an idea how they work. For this tutorial, we will need to create one Workflow HEADER, and two Workflow TAB files. Additionally, we will need to write a quick function as well.
-
First create your Workflow HEADER file. A header file is determined by setting the header parameter to true. It can be named anything and should contain just a comment block that looks like this:
<?php
/*
Flow: Add Post
Page: post.php, post-new.php, post-edit.php
Post Type: post
Header: true
Position: title
*/
Let’s break down the comment block:
Flow: we are naming this flow “Add Post”. This is just a name that ties all the workflow files together.Page: Which pages should this flow appear on.Post Type: What post type should this flow work with.Header: Since this is the header file, this parameter should be true.Position: Where the flow should start on the page. In this case we are using “title”, which Piklist maps to the WordPressedit_form_after_titleaction.
Now we are going to create two TAB files, for the two steps in this Workflow. Again, the files can be named anything. As long as they have these comment blocks, and are located in your parts/workflows directory, Piklist will render them. Here are the comment blocks for the two files:
<?php
/*
Title: Step 1
Order: 10
Flow: Add Post
Default: true
*/
<?php
/*
Title: Step 2
Order: 20
Flow: Add Post
*/
Let’s break down these comment blocks:
Title: Tab titleOrder: What order should this tab appear in the flow.Flow: This is the same as we defined in the header file.Default: Which is the default tab.
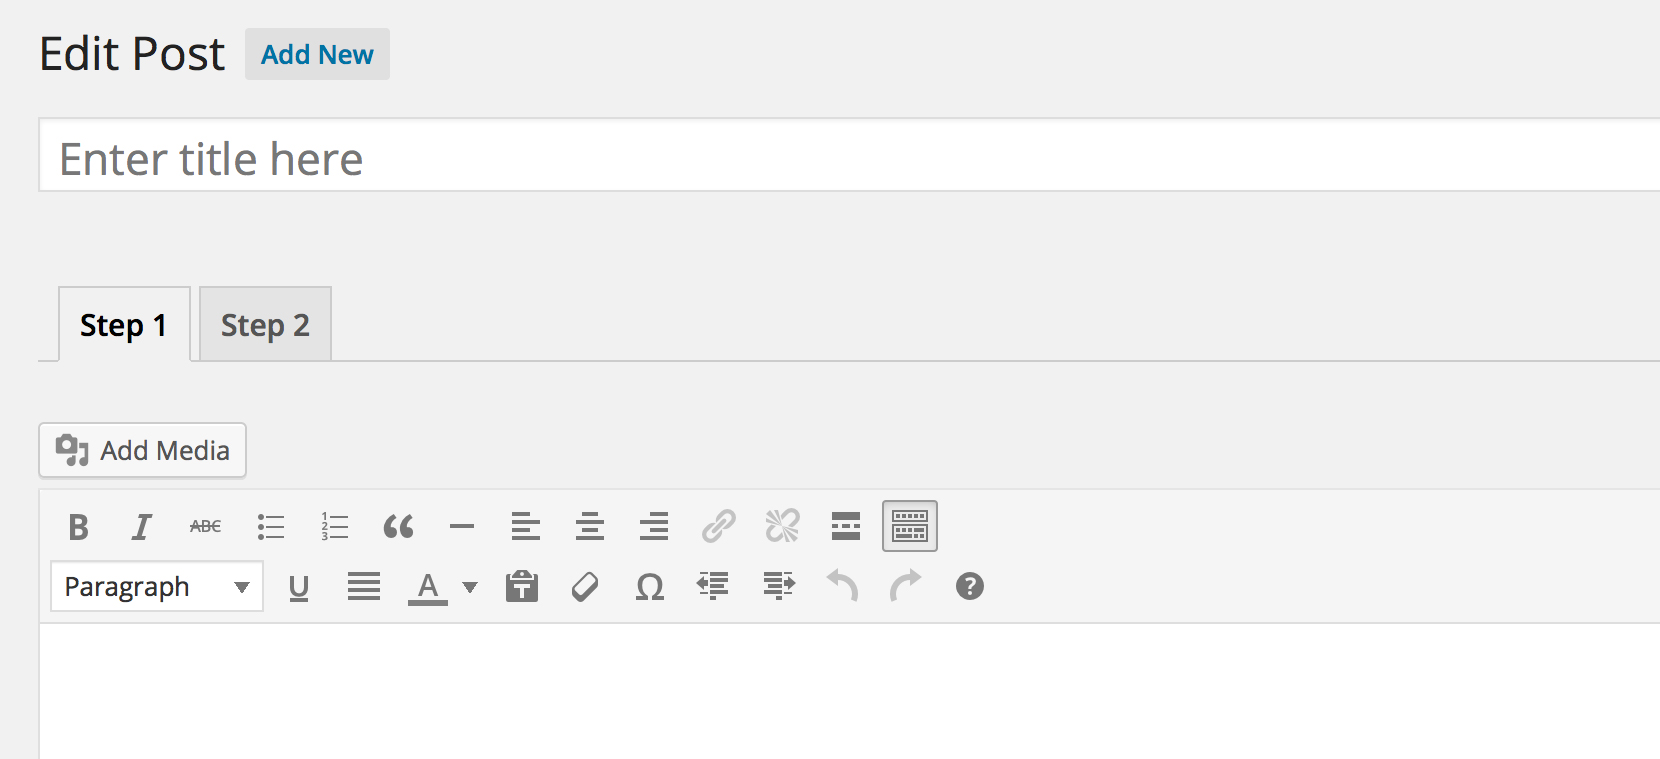
At this point, you should have the Workflow setup with two tabs, with the Editor appearing in both. The next step is to only have the Editor appear in Step 1… so we need to remove it from Step 2. We are going to use the WordPress function remove_post_type_support to remove the Editor from Step 2. In your plugin file, or themes functions.php file, place this code:
function my_remove_from_flow() {

 if ( isset( $_REQUEST['flow'] ) && $_REQUEST['flow'] == 'add_post' && $_REQUEST['flow_page'] == 'step_2' ) {

  remove_post_type_support( 'post', 'editor' );

 }

}
add_action( 'admin_init', 'my_remove_from_flow' );
This code is hooking to admin_init(), and looking at the HTTP Request variable. If $_REQUEST is set to flow, and the flow is add_post (set in the header file), and the flow_page is step_2, then remove post type support for the Editor with Posts.
That’s it! You now have the default Add New Post page placed in a Piklist Flow. Refer to the Building Your First Workflow Tutorial to find out how to add fields to Step 2 of your Workflow.