Grouping child taxonomies by their parents
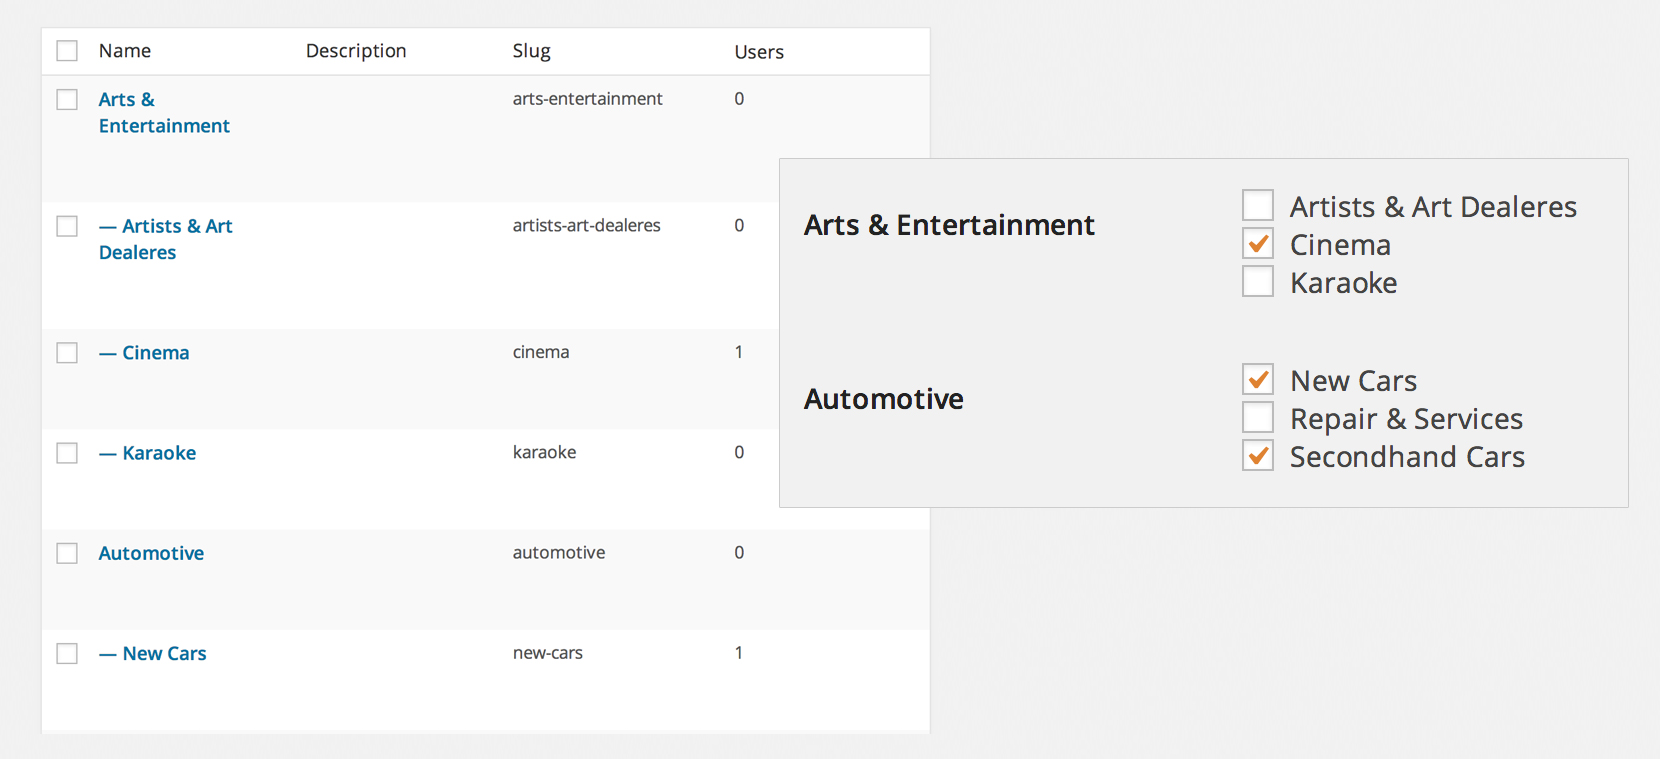
WordPress hierarchical taxonomies allow you to assign terms to a parent term. In this tutorial we’ll show you how to group the child terms under each parent, and make the parent unselectable, forcing the user to only select the children.
The basis of this tutorial is the flexibility of the Piklist field function, which we will place in a foreach loop.
This tutorial assumes you have already created a hierarchical taxonomy or you’re using the default WordPress Categories. In our example we will be using a custom taxonomy called company_type.
Before you start this tutorial:
- Install Piklist like you would any other WordPress plugin.
- Decide if you are going to add the code in this tutorial to your custom plugin or your theme. This will define how to setup your Piklist folder structure.
- If you're new to Piklist, you may want to review the "Getting Started" tutorial first. It gives you a good overview of how Piklist works.
First get the Parents
Using the standard WordPress function get_terms(), we will first get all the Parents for this taxonomy. Setting 'parent' => 0 returns all top-level terms.
$parents = get_terms('company_type', array(
  'hide_empty'  => false
  ,'parent'  => 0
));
Next, assign the Children
Now that we have the parents, we need to loop through each one, then show their child fields using the Piklist Field function. Then we pass some parameters to the Piklist Field function for each Parent ID.
Once again we will use the WordPress function get_terms(), to get our child taxonomy values. This function stores data in an array, and with Piklist, parsing an array and displaying it as Checkboxes (or Radio buttons… or a Select box) is really easy. As you can see from the WordPress Codex page, this array stores all data in an Object, and then breaks them out. You have access to fields like term_id, name, child_of etc.
foreach ($parents as $parent => $value) {
piklist('field', array(
    'type' => 'checkbox'
    ,'scope' => 'taxonomy'
    ,'field' => 'category'
    ,'label' => $value->name
    ,'choices' => piklist(
        get_terms('category', array(
          'hide_empty' => false
          ,'child_of' => $value->term_id
        ))
        ,array(
          'term_id'
          ,'name'
        )
    )
  ));

}
Let’s take a look at this code:
- First we created a standard Piklist Checkbox list.
- Notice we set the scope here. In most cases Piklist will automatically determine the scope. But when using taxonomies you will need to set
'scope' => 'taxonomy'. - In this example we make the label parameter dynamic, passing it the Parent name
$value->name. - The choices array gets pulled in dynamically. We told Piklist to use the
get_terms()function, and told it to get the company_type taxonomy values. We also passed it two parameters:hide_emptyandchild_of. Both standard forget_terms(). We set child_of as the Parent term id:$value->term_id. - The next array in the choices array tells Pikist what should be the KEY for the field, and what should be the VALUE. In this case we selected
term_idas the KEY, and name as the VALUE to show in the list.
Full snippet
$parents = get_terms(array(
  'taxonomy' => 'company_type'
  ,'hide_empty' => false
  ,'parent' => 0
));

foreach ($parents as $parent => $value) {

  piklist('field', array(
    'type' => 'checkbox'
    ,'scope' => 'taxonomy'
    ,'field' => 'company_type'
    ,'label' => $value->name
    ,'choices' => piklist(
        get_terms(array(
          'taxonomy' => 'company_type'
          ,'hide_empty' => false
          ,'child_of' => $value->term_id
        ))
        ,array(
          'term_id'
          ,'name'
        )
    )
  ));

}