Create a Dashboard Widget to show an RSS Feed.
Description
Piklist makes it super easy to create Dashboard Widgets in WordPress. This way you can concentrate on your widget code, and let Piklist do the hard part.
New to Piklist?
Before you start this tutorial:
- Install Piklist like you would any other WordPress plugin.
- Decide if you are going to add the code in this tutorial to your custom plugin or your theme. This will define how to setup your Piklist folder structure.
- If you're new to Piklist, you may want to review the "Getting Started" tutorial first. It gives you a good overview of how Piklist works.
- Create a PHP file in your
/parts/dashboard/folder. It doesn’t matter what you name the file. For this example we’ll call itrss-news.php. - At the top of the file, add this code:
<?php
/*
Title: Piklist News
Capability: read
*/
?>
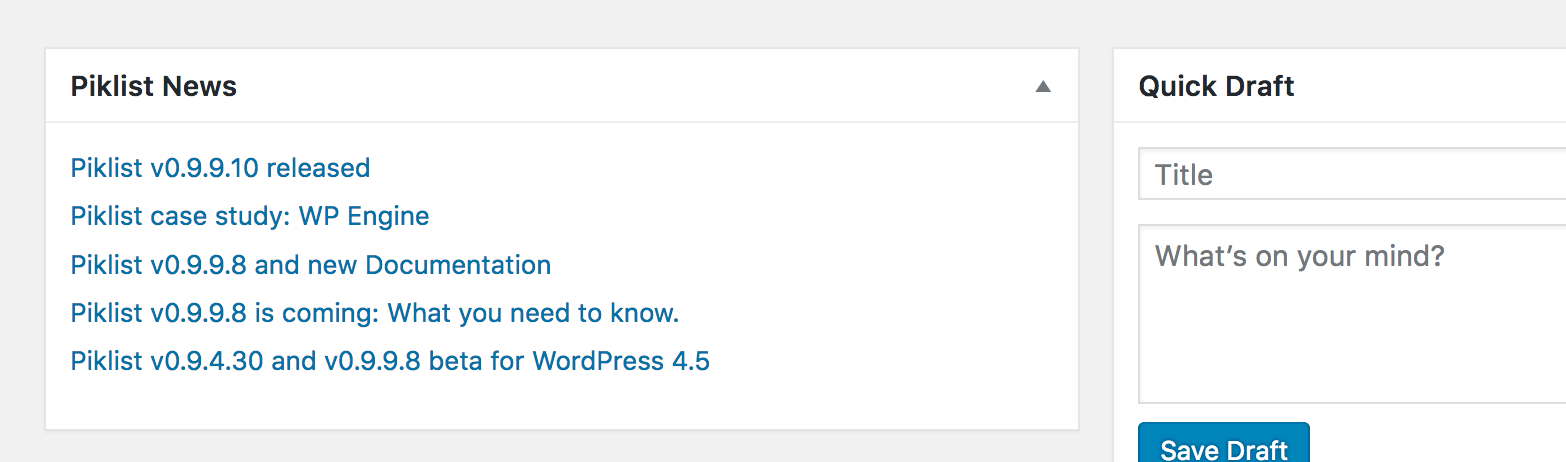
This code tells Piklist to create a Dashboard Widget named “Piklist News”, and any user with the read capability can see it. If you go to your admin Dashboard you will see the widget show up.
- The next step is to add the code to grab the RSS feed and render it. We’ll use the code example for the
fetch_feedexample on wordpress.org.
That’s it! You just created a Dashboard Widget.
Full Snippet
<?php
/*
Title: Piklist News
Capability: read
*/

include_once( ABSPATH . WPINC . '/feed.php' );

// Get a SimplePie feed object from the specified feed source.
$rss = fetch_feed( 'http://piklist.com/rss/' );

$maxitems = 0;

if ( ! is_wp_error( $rss ) ) : // Checks that the object is created correctly

    // Figure out how many total items there are, but limit it to 5.
    $maxitems = $rss->get_item_quantity( 5 );

    // Build an array of all the items, starting with element 0 (first element).
    $rss_items = $rss->get_items( 0, $maxitems );

endif;
?>

<ul>
    <?php if ( $maxitems == 0 ) : ?>
        <li><?php _e( 'No items', 'my-text-domain' ); ?></li>
    <?php else : ?>
        <?php // Loop through each feed item and display each item as a hyperlink. ?>
        <?php foreach ( $rss_items as $item ) : ?>
            <li>
                <a href="<?php echo esc_url( $item->get_permalink() ); ?>"
                    title="<?php printf( __( 'Posted %s', 'my-text-domain' ), $item->get_date('j F Y | g:i a') ); ?>">
                    <?php echo esc_html( $item->get_title() ); ?>
                </a>
            </li>
        <?php endforeach; ?>
    <?php endif; ?>
</ul>